
One of the challenges of indoor container gardening is water leaking out of the bottom of your pots. Not surprisingly, most people don’t particularly like puddles of water on the floor. There are essentially two options. You could put a saucer underneath your pot, or you could use a cachepot. A cachepot is a spiffy outer pot with no drainage hole. You then put the real pot with drainage holes inside. You get the sleek look of a pot without a saucer, and all water is contained within the cachepot and not puddled on your floor.
And guess what? You can totally make your own cachepot. Here are a couple of ideas…
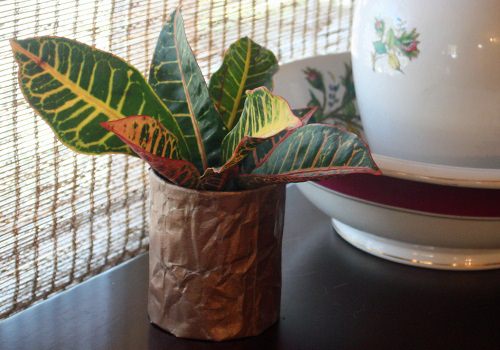
Crumpled Copper Cachepot
What you’ll need:
- 1 brown paper bag
- 1 can of copper spray paint
- 1 can of spray adhesive
- craft glue
- Scissors
- 1 can, plastic box, tin, or other inexpensive container
How to Make DIY Cachepots
1.

Cut the bag apart so that you have a strip that is a few inches longer and wider than your container. Slightly crumple the paper bag and then smooth it out to give it some texture. Lay it flat on your work surface. Spray the paper strip with short strokes of copper spray paint. Repeat until the strip is evenly coated.
2.
Spray the outside of the container with the adhesive and allow it to become tacky. Lay the container down near one end of the crumpled paper. Bring the paper around the container, pressing and smoothing as you go. When you have completely wrapped the container, fold over the edge to make it look nice and use the craft glue to adhere the folded edge to the container.
3.
In order to fold the top and bottom edges neatly down, make a cut in the part of the paper that hangs over the edge every inch or so. Use the craft glue secure them to the can.
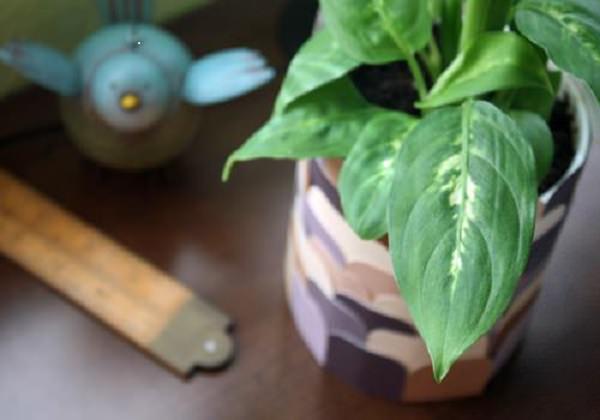
Paint Chip Cachepot
What you’ll need:
- A BUNCH of paint chips in colors to match your decor
- Craft glue
- Scissors
- Rounded edge craft punch
- 1 can, plastic box, tin, or other inexpensive container
- 1 can of clear sealer spray
How to Make Paint Chip Cachepot
1.
Cut your paint chips apart so that each color is separated from the others. You’ll also probably want to cut each color into thinner strips (mine are about 1/2 inch wide). Use your craft punch to round both of the corners on one side of the color strip.
2.
Draw a thin bead of paint all the way around the top of the container.
3.
Place your color chip strips side by side along the top edge of your container. Be sure that the rounded edge is peaking up over the top edge of the container.
4.
When you’ve completed the first row, add a second bead of glue an inch or so below the top edge of the container. Add your second row of paint chip strips, staggering them so that you make a fish scale pattern. Repeat until the container is covered by paint chip strips. Trim the last row if needed, so that there is a smooth edge at the bottom of the container.