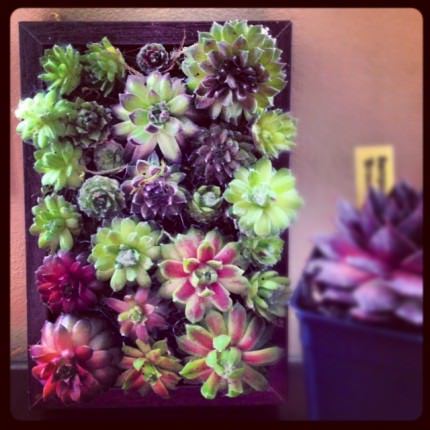
Here are the step-by-step instructions to make a succulent picture frame!
What You’ll Need:
- Sempervivum cuttings (I used Whirligig, Alone, 735 Belgium, and Korump)
- A few scraps of chicken wire
- Shadowbox-style photo frame (I bought this small one at the dollar store)
- Cactus potting soil
- Sphagnum moss
- Staple gun
- Gloves
Instructions:
1.

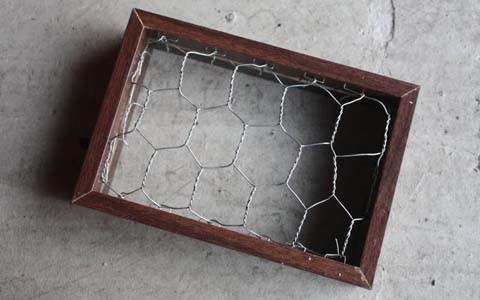
You start by stapling a piece of chicken wire that is a little larger than your frame to the inside of the frame. This will make a nice front face for your frame.
2.

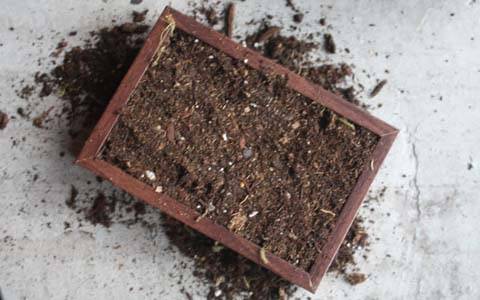
Next, you make a little sandwich. Not one you’d want to eat, but your sempervivums will enjoy it. Layer sphagnum moss down on the inside of your frame, right on top of the chicken wire you just stapled. Then pack in as much of the cactus potting mix as you can.
3.

Now, layer another bit of sphagnum moss down. The moss is preventing the soil from falling out but still allows water to drain away.
4.
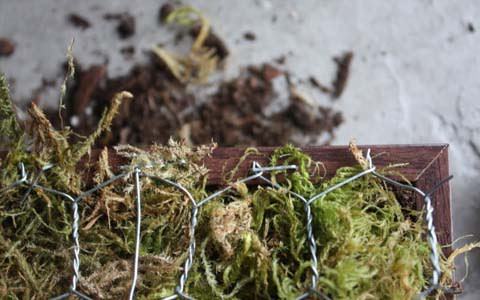
Finally, staple the second piece of chicken wire (this one should be slightly smaller than your frame) to the back.
5.
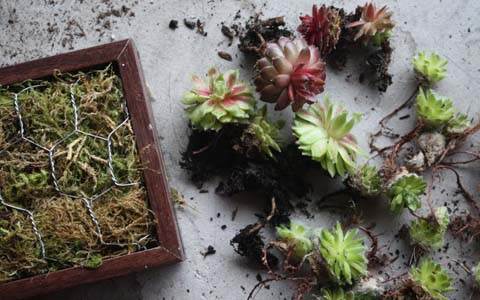
Now you’re ready for the fun part. Collect your sempervivum cuttings. Since sempervivums make so many little offsets (the “chicks”), it is easy to just clip a few off (enough to fill your frame) without even taking the mother plant (the “hen”) out of the pot. Be sure to leave a little bit of the umbilical cord on the cutting, as this will help you stick your plant into the frame and keep it there until roots form.
6.

As sempervivums grow, they often create a shaggy layer of dead leaves at their base. Gently pull those off so that you can get the plant flush with the chicken wire/photo frame. The photo on the left is the before and the right is the after.
7.
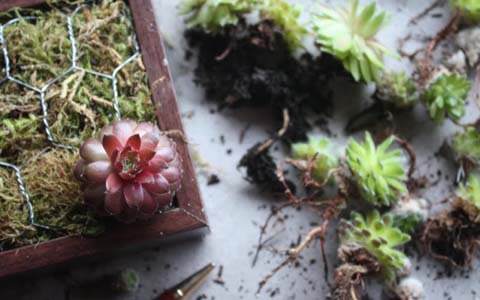
Using a pen or some other similar shaped object, poke a little hole into the sphagnum moss and put the sempervivum’s umbilical cord into the hole. I found that gently twisting the plant back and forth helped it get situated.
8.

Continue to fill in with more plants until you’ve completed your frame.
9.
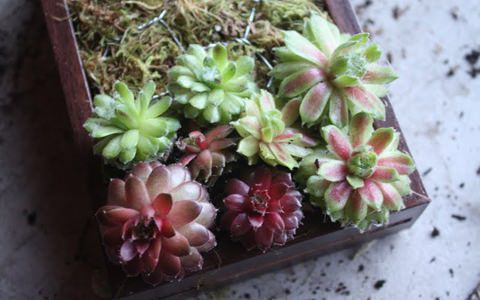
Let it lay flat for two weeks so that the roots can develop before hanging it upright.