Build DIY Garden Path and Wall with Old Concrete to save money and reduce waste. An eco-friendly way to upgrade your outdoor space.
Make useful, cost-free features for your garden with recycled concrete
If you’ve been putting off garden improvements because of the high cost of rock, stone, and other hardscaping materials, it’s time you considered recycling concrete.
The next time a neighbour takes out an old concrete patio or driveway, ask for first dibs on the discards. Scout around demolition sites and ask local contractors as well. Don’t let the dump truck take this valuable stuff away-you can make good use of it in your garden for building pathways and retaining walls-and all for free! And quite probably, the neighbour or contractor will be glad to get this “junk” off their hands and save the removal costs.
The discarded concrete will likely have weathered down to a mellow colour and, with a bit of luck, will have already been broken into manageable pieces. Once your project is complete, you can pat yourself on the back and feel smug about the fact that your good-looking path or wall not only costs next to nothing, but is environmentally friendly, too.
Concrete is usually poured in layers 10 to 15 centimetres thick and sometimes contains metal bars (called rebar) to strengthen it. If the rebar is protruding from the pieces you collect, you will need to remove it with a pickaxe, heavy maul, or jackhammer. Be safety-conscious as you proceed: wear protective gloves, safety goggles, and footwear, and lift concrete pieces with your legs, not your back. Here’s how to use your recycled treasure:
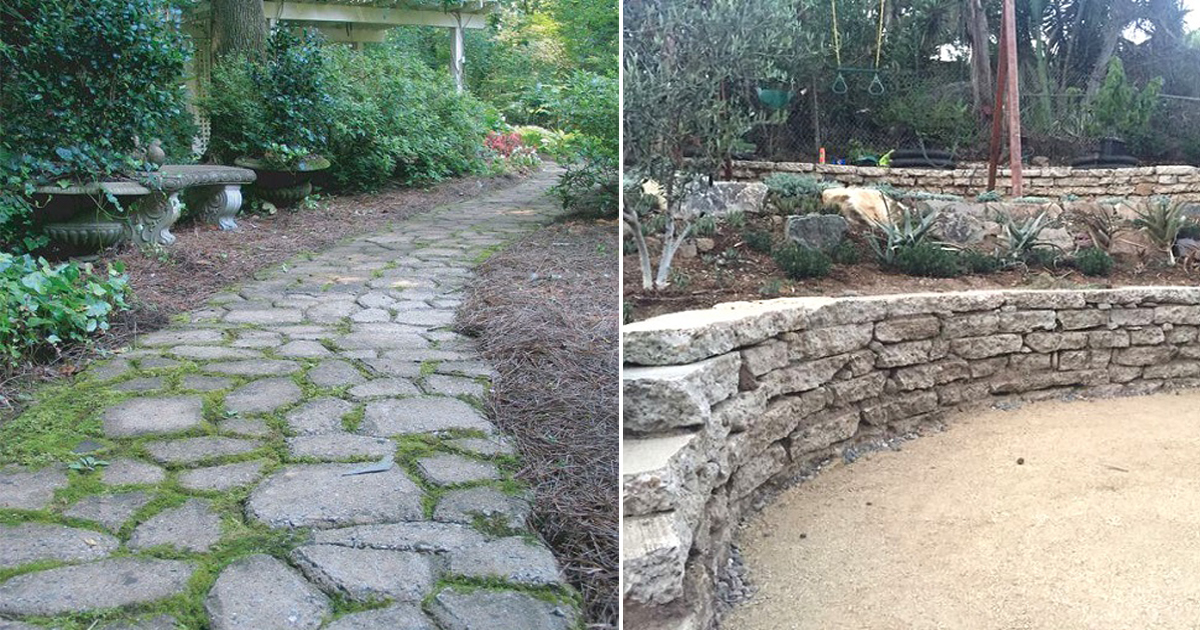
DIY Garden Path and Wall with Old Concrete
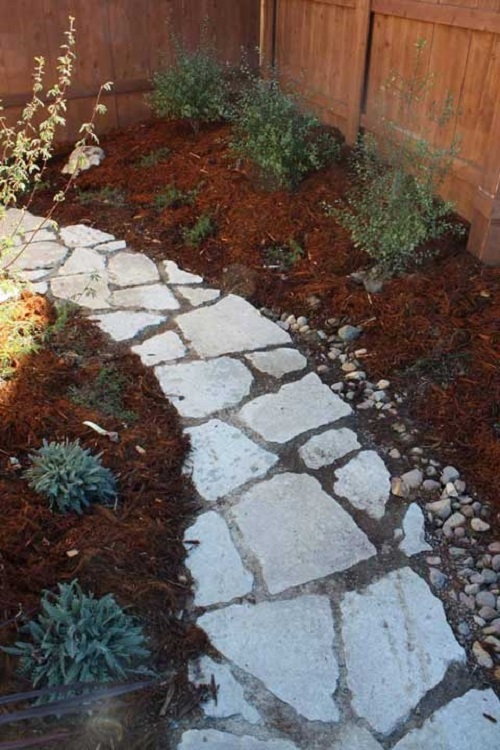
Pathway
The concrete will have one smooth side; use this as the surface of your pathway. Choose a mix of small and large irregularly shaped pieces, keeping to a size no larger than 0.5 by 0.5 metres and no smaller than 20 centimetres.
1 Dig out the pathway 5 centimetres deeper than the thickness of the concrete. Level the soil with a tamper or fence post (or the feet of the heaviest member of the family).
2 Put down heavy landscape fabric or an old pool liner to prevent weeds and grass from growing. If you want grass to grow between the concrete pieces, omit the fabric.
3 Cover the liner or ground with at least 5 centimetres of sand or crushed gravel.
4 Lay the concrete pieces 2.5 to 5 centimetres apart in an informal, random fashion.
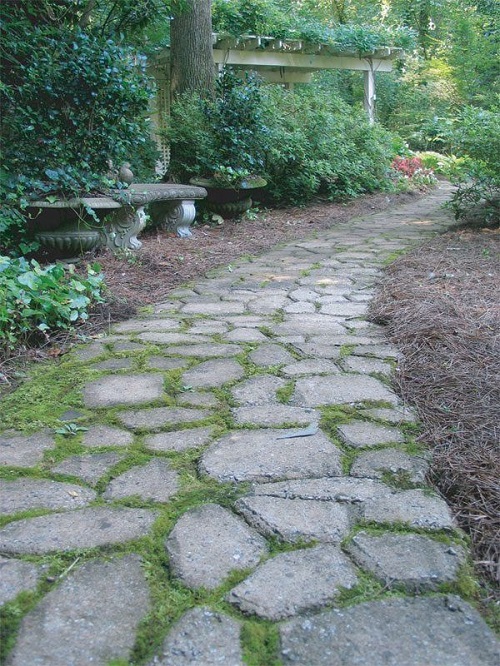
5 If using a liner, pour sand or gravel in between the pieces and tamp down. For grass, fill spaces with soil instead of sand or gravel, tamp down, and water thoroughly. Top up with more soil to the same level as the concrete; then broadcast some lawn seed. Keep the seed moist; it should sprout in about 10 days. If you’ve cut the path from the existing lawn, use this turf in between the concrete.
Use the same method to build a patio from recycled concrete. To make the patio or pathway a little more interesting, sections can be planted with Dianthus spp., woolly thyme (Thymus pseudolanuginosus), violets, bugleweed (Ajuga spp.), or other plants suitable for a rock garden.
Build a garden wall
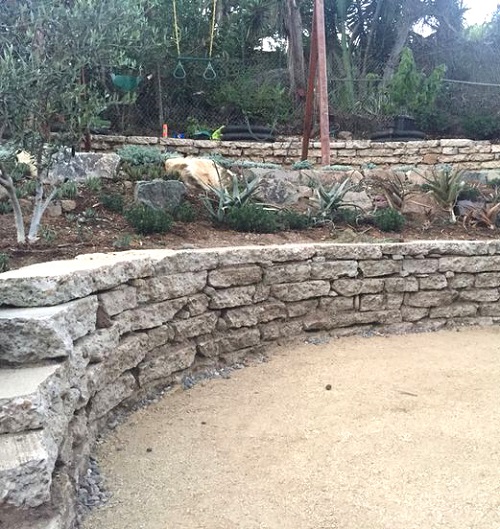
The edge to be faced with concrete should be no higher than 60 centimetres. Staggering the concrete pieces back into the face of the slope gives greater stability and looks more attractive. For a wall 60 centimetres high by 20 centimetres wide by 9 metres long, you will need approximately one cubic metre of concrete. Concrete pieces should be approximately 20 centimetres long or wide, but not more than 45 centimetres. This range gives a good finished look to the wall.
1 Dig out a gentle slope (approximately 45 degrees) into the bank and tamp the exposed edge to stabilize it.
2. Cut into the bank where concrete pieces are to be placed. To achieve a relatively even rock face along the front, you will need to cut further into the bank for larger pieces. Then, place the pieces down flat, with the smooth edge facing upward and the exposed, rough edge facing you. Work on one level at a time, from the bottom up, along the whole length of the wall.
3 Fill gaps where one concrete piece meets another with soil, pushing the pieces hard into the edge and stabilizing them. Make sure each layer is level before moving on to the next.
4. Overlap the edges of the concrete pieces and continue until the wall is the required height.
Walls are more visually appealing if they are curved or irregular and have small, recessed areas where trailing plants can be established. Use plants such as ivy, yellow creeping Jenny (Lysimachia nummularia ‘Aurea’), bugleweed, flowering strawberries (Fragaria spp.), as well as Alyssum spp. and other annuals.