As an Amazon Associate, we earn a small commission from qualifying purchases — at no extra cost to you.
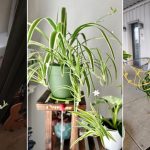
I am really excited to publish this guest post/giveaway from Life on the Balcony’s second reader (after my husband). Roberta, my mom, loves to express her artistic side through crafting. She has been sewing since childhood, and has added quilting, crochet, stamping, paper crafting, and scrapbooking to her repertoire. When not crafting, she enjoys reading, exercising, photography, traveling and spending time with her family.
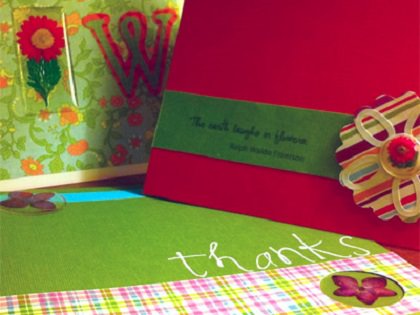
My mom really loves a website called Peachy Cheap which is basically the paper crafting world’s version of Woot, a website that sells very small quantities of a product at ridiculously low prices. That’s where she found “page pebbles” (clear, raised stickers that act as tiny magnifying glasses) with dried flowers embedded in them. She made three really cute cards with the page pebbles. My mom agreed to share how she made the cards, and allow me to give away the cards and extra page pebbles to one lucky person. Instructions and details below…
Inspiration: Paper Crafts Magazine’s Go to Sketches![]()
Tools: Making Memories’ portable, digital die-cutting machine called Slice![]()
Supplies: Petal Pebbles from Pressed Petals, cardstock and envelopes, Flower Shower Spring Matstack from DCWV, paper ribbon and letter stickers from Creative Memories, letter rub-ons from Making Memories, scallop punch from Fiskars, circle punch from Family Treasures, various adhesives
Card #1-Bloom and Grow
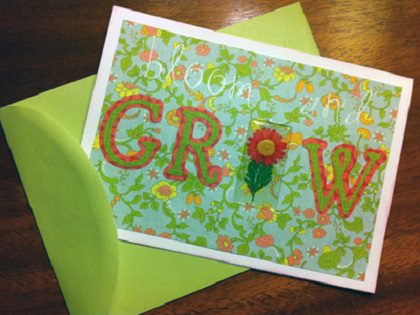
- Adhere flower paper from the matstack to the front of the card.
- Cut letters G, R and W from coordinating papers from the matstack using the Slice and the Think Pink Design Card.
- Adhere letters to the front of the card, leaving a space where the “O” would go, placing the Petal Pebbles flower instead.
- Apply rub-on letters.
- Ink or chalk the edges of the card.
Card #2-Thanks
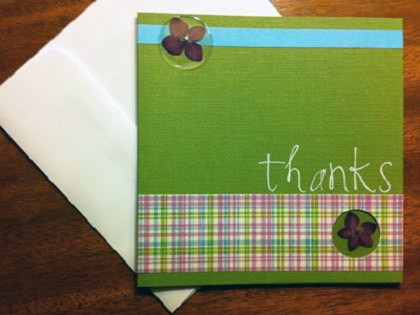
- Measure and cut paper ribbon and paper strip to fit card.
- Adhere ribbon and paper strip to card, then punch circle through both the paper and the cardstock.
- Apply rub-on sentiment.
- Adhere Petal Pebbles to the card, one on the top left corner, and the other inside the card under the circle opening.
- Cut frame for the envelope using the Slice die-cutting machine by Making Memories and the Think Pink Design Card. Adhere to the front of the envelope.
Card #3-The Earth Laughs in Flowers
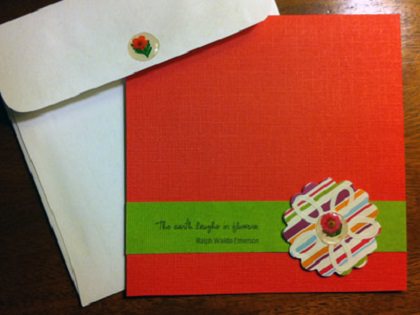
- Measure and cut paper ribbon to fit card.
- Print sentiment on the paper ribbon and adhere to card.
- Punch scallop circle from paper.
- Adhere sticker “o’s” to circle to make petals.
- Adhere Petal Pebble to the center of the flower and the back flap of the envelope.
- Adhere flower to the card using a foam square to raise it up.