As an Amazon Associate, we earn a small commission from qualifying purchases — at no extra cost to you.
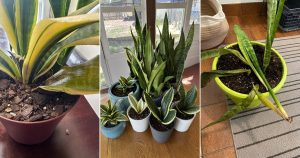
Learn How to Train a Snake Plant Around a Bottle for a Unique Living Sculpture that give an entirely different look to your plant collection.

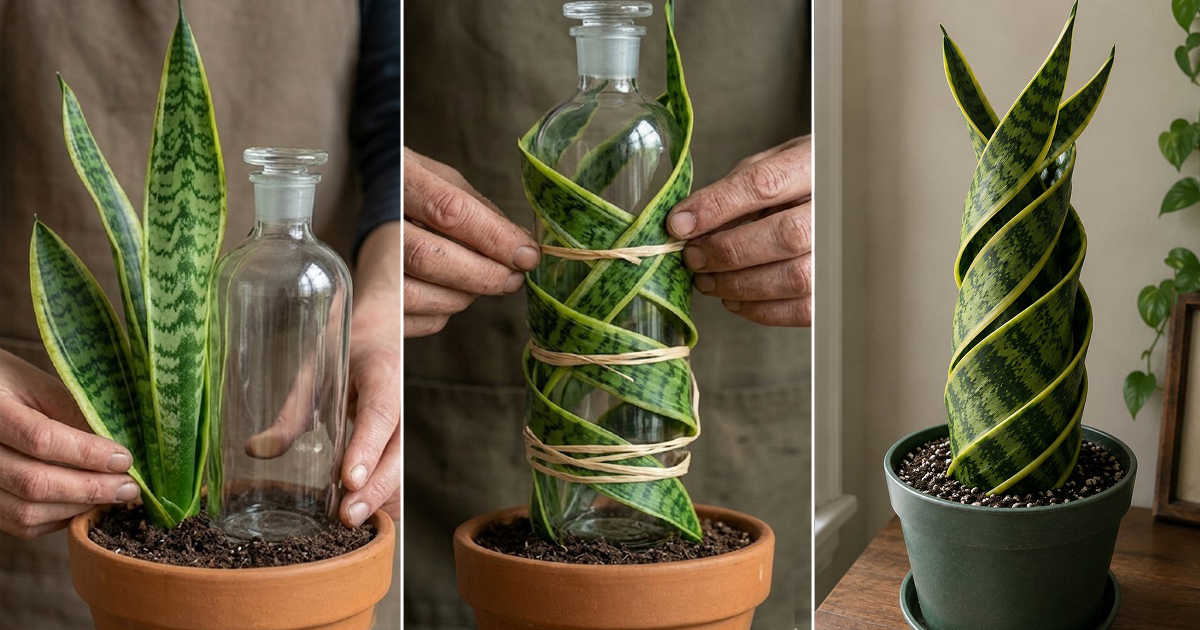
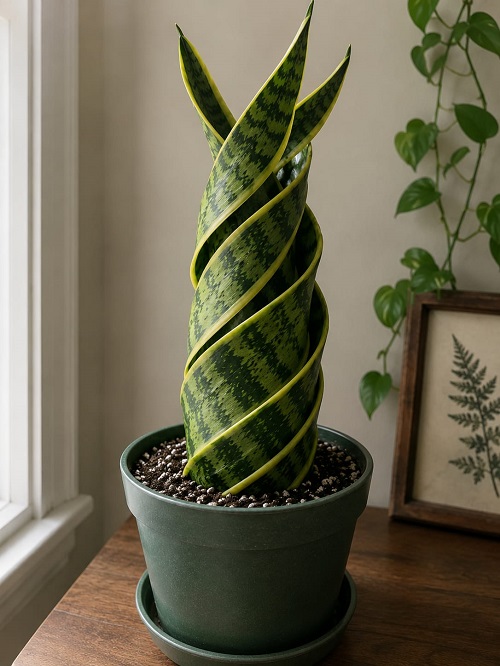
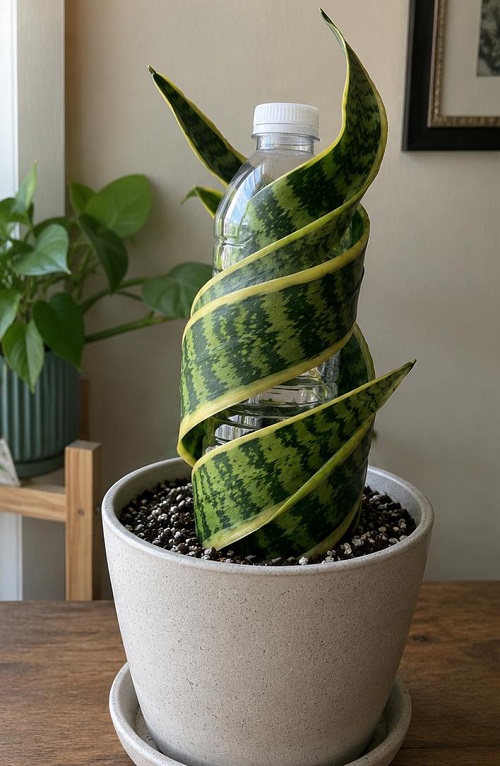
Many gardeners enjoy experimenting with plant shapes to create unique displays. When you train a snake plant around a bottle, you transforms a common houseplant into a decorative centerpiece. The spiral shape adds height, texture, and visual interest without harming the plant when done correctly. If you also want to try this project just follow this post and find How to Train a Snake Plant Around a Bottle for a Gorgeous Spiral Shape.
This method works especially well for taller snake plant varieties with long, flexible leaves. The bottle acts as a temporary support structure, which encourages the leaves to grow in a twisting pattern.
How to Train a Snake Plant Around a Bottle for a Unique Living Sculpture
1. Select the Right Snake Plant
Not every snake plant is suitable for this project. Young plants with healthy, flexible leaves are easier to train than older plants with stiff, mature foliage.
Look for a snake plant that has several long leaves growing close together. The leaves should be free from damage, yellowing, or disease. Healthy leaves bend more easily and recover better from gentle shaping.
- Sansevieria trifasciata ‘Laurentii’ is one of the best choices. The tall leaves and yellow-edged variegation make the spiral design stand out beautifully.
- Sansevieria zeylanica is another excellent option. It has long, sword-like leaves with attractive green patterns that look striking when twisted around a support.
- Sansevieria trifasciata ‘Black Coral’ works well if you want a dramatic appearance. The dark green foliage creates a bold sculptural effect.
- Sansevieria trifasciata ‘Futura Superba’ can also be used when young, although its shorter leaves may create a more compact spiral.
Avoid dwarf varieties such as Bird’s Nest Snake Plant (Sansevieria ‘Hahnii’), as their short leaves are not long enough to wrap around a bottle effectively.
Note: Avoid plants that are severely root-bound or stressed, as they may struggle during the training process.
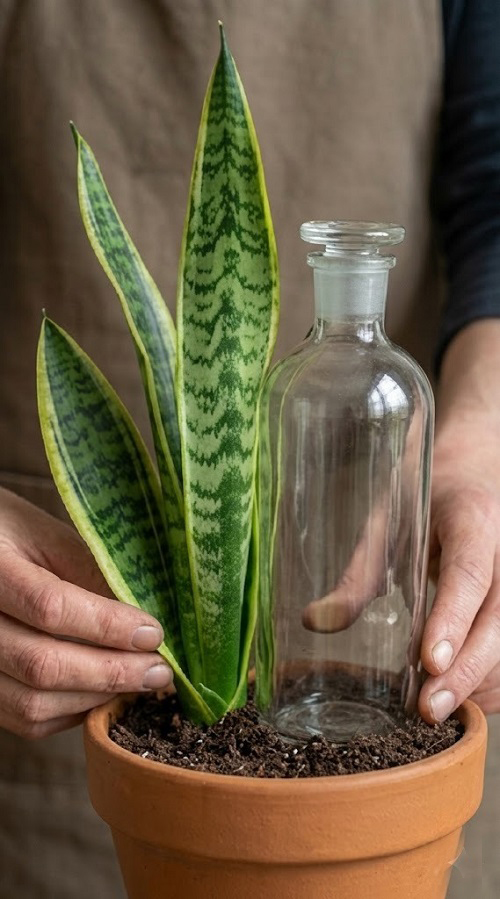
2. Choose the Perfect Bottle
In this project, the bottle serves as the framework for your living sculpture. A smooth plastic bottle is often the safest choice because it is lightweight and less likely to break.
Select a bottle that is tall enough to support most of the plant’s height. The diameter should be large enough to allow the leaves to wrap around it without being forced into sharp bends.
Tip: Clear bottles are often preferred because they are less noticeable while the plant is being trained. Once the shape is established, the bottle can usually be removed.
3. Prepare the Plant
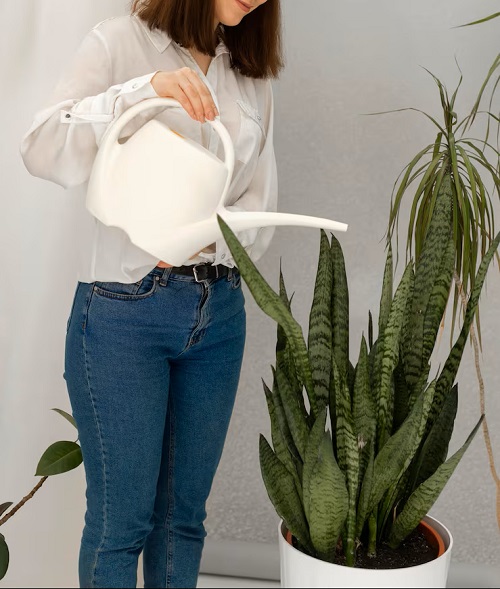
Before starting, water the snake plant lightly a day or two beforehand. Leaves that are slightly hydrated tend to be more flexible than extremely dry ones.
Inspect each leaf carefully. Remove any damaged or dead foliage. Clean the leaves with a soft cloth to remove dust and make handling easier.
Place the bottle securely in the center of the pot. Push it gently into the soil so it remains stable throughout the training process.
How to Wrap the Leaves Around the Bottle

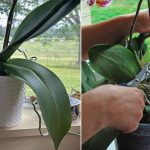
1. Begin with the outermost leaves. Slowly guide each leaf around the bottle, creating a gentle spiral pattern. Never force a leaf into position, as snake plant leaves can crack if bent too sharply.
2. Work gradually, wrapping one leaf at a time. The goal is to create smooth curves rather than tight twists. As each leaf is positioned, secure it loosely with soft plant ties, garden tape, or strips of fabric.
3. Make sure the ties are not tight enough to cut into the leaves. The leaves should be held in place while still allowing room for natural growth.
4. Continue working upward until all suitable leaves have been arranged around the bottle.
When to Remove the Bottle
Once the leaves have held their spiral position for several months, you can test whether the shape has become stable.
Carefully remove the ties and observe the plant. If the leaves remain in place, you can gently remove the bottle. If they begin to straighten significantly, replace the supports and allow more time for training.
Some gardeners prefer leaving the bottle hidden inside the foliage as a permanent support structure. Either method can work successfully.
Common Mistakes to Avoid
The biggest mistake is forcing the leaves into sharp bends. This can create cracks that permanently damage the foliage. Gentle adjustments over time always produce better results.
Another common mistake is choosing an overly mature plant. Older leaves are less flexible and more likely to break.
Overwatering is also a frequent problem. Wet soil weakens the roots and can cause serious health issues. Maintaining proper watering habits is essential throughout the training process.
Finally, avoid placing the plant in direct harsh sunlight immediately after training. Stressed leaves need time to adapt to their new position.
Points to Remember
- Creating a spiral snake plant is not an overnight project. The leaves need time to adapt to their new position.
- Keep the ties in place for several weeks or even a few months, depending on the plant’s growth rate. As new growth appears, continue adjusting the leaves gently to maintain the desired shape.
- Check the ties regularly to ensure they are not becoming too tight. As the leaves grow, loosen or reposition them when necessary.
- Patience is the key to achieving a natural-looking spiral that appears as though the plant grew that way on its own.